DIY French Seam Slipcovered Bed
Some affiliate links are used at no additional cost to you. Thank you for supporting my blog! For more information, visit my Disclosure.

Last time I checked in with you here I was sharing some updates that I had been working on in Izzy’s room. One of those updates was making her a new bed. She wanted a simple, neutral bed which was a perfect choice. We found this Serena & Lily slipcovered bed and used it as inspiration for the build. Today I’m going to share with you how I made her DIY French seam slipcovered bed for a little over $200.
There are some affiliate links used in this post, purchases made through those links will not add any additional cost to you, and I thank you for supporting my blog in this way. For additional information, please visit my disclosure.

Material’s Used
Her bed is a queen size so all measurements are based on a queen. Adjust your measurements according to your bed size.
- 6.5 yards – 54″ wide fabric for headboard slipcover and bedskirt sides (Note: You could save on fabric by using a cheaper fabric for the wall side of the headboard that isn’t seen and then you would only need 5 yards of your nicer fabric)
- 4 yards – 43″ wide flannel fabric for bedskirt base
- 6 yards – 48″ wide 10 oz batting
- 1/2″ plywood cut to 48″x62″ (for a queen size bed)
- staple gun
- sewing machine & thread
- scissors & pins
Step 1
The first thing you will do is create the base for the headboard. Cut a 1/2″ thick piece of plywood to be 48″ tall by 62″ wide. You can typically have this done for free at your local hardware store.
Step 2
Cut FOUR pieces of batting the same size as your plywood (48″x62″). Note: I originally only cut two pieces of batting as shown in the photo below, but decided to add two more because the headboard didn’t seem plush enough with just two.
Cut a piece of muslin fabric several inches larger than the plywood so you have enough fabric to wrap around the back and staple.

Step 3
Layer the muslin fabric down first, then the FOUR layers of batting, followed by the plywood on top.

Pull the muslin fabric tight while stapling in place along all four edges and corners. Cut off any excess fabric.

This is the base of the headboard that will then have a slipcover slid over.

Step 4
Now to make the slipcover. I used a heavy weight upholstery fabric and I don’t have intentions of washing the slipcover of bedskirt after I make it so I didn’t prewash my fabric. However, if you are using a fabric that is washable and you intend to wash your slipcover and bedskirt from time to time then go ahead and prewash and dry your fabric before continuing. Take into consideration any shrinkage when ordering yardage of your fabric.
Cut two pieces of fabric to be 66″x54″. This will give you enough excess for a 1/2″ seam allowance and a 1″ flange along the top and sides of the headboard. Pin right sides of the fabric together and stitch together along the sides and top. Snip across your top corners so they lay nice and flat before turning right side out.

Step 5
Turn your fabric right side out and press the seams with an iron. Now do a dry fit of the slipcover over the headboard base to determine hem length and flange size.

Pin a 1″ flange along the corners to make sure you have enough width to do a 1″ flange all around the top and sides. You’ll want the fabric to be nice and snug. Once you have determined the size of your flange (should be 1″), measure down to see how much you need to hem the bottom.
You will want the bottom of the slipcover to be hemmed before you stitch the top and sides for the flange.

To hem the bottom you can do a straight stitch, but my preference is a hidden stitch. I’ll use a hidden stitch for all the other hem pieces on the skirt as well. If you’re unfamiliar with a hem stitch there are video tutorials on YouTube that are very helpful.
Step 6
Now that the bottom of the slipcover is hemmed, stitch the flange for the sides and top. With the slipcover facing right sides out, stitch a straight line 1″ in from the edges along the sides and top.
Slide the slipcover over the headboard base. This should be a snug fit so that the fabric doesn’t look sloppy. Once on, steam out any wrinkles in the fabric.

Step 7
Now comes the bedskirt.
What makes this bed look more high end is the tailored bedskirt that matches the headboard. I wanted to make sure I didn’t mess up this part so I searched for a bedskirt tutorial. You won’t believe what I found. Suzannah at Create/Enjoy had already made the EXACT same bed I was making! I followed her bedskirt tutorial with one slight change that I will explain below. My headboard was also made almost identical except that she made a bed frame and attached the headboard to that, where I am using our existing metal mattress/box spring frame and did not attach it to the frame. If you’re looking for a full bed tutorial and are not using a boxspring, definitely check hers out to see how she did it!
Ok, for the exposed skirt portion of the bedskirt you are going to be using the same fabric as your headboard but a different fabric for the hidden part that lays on top of your box spring. You can use a muslin fabric for that, but I liked what Suzannah did by using a flannel fabric for a couple of reasons: 1) I could get it in a color that was a perfect match to my headboard and skirt fabric; and 2) the flannel would have more grip than muslin and would therefore have less chance of sliding around.
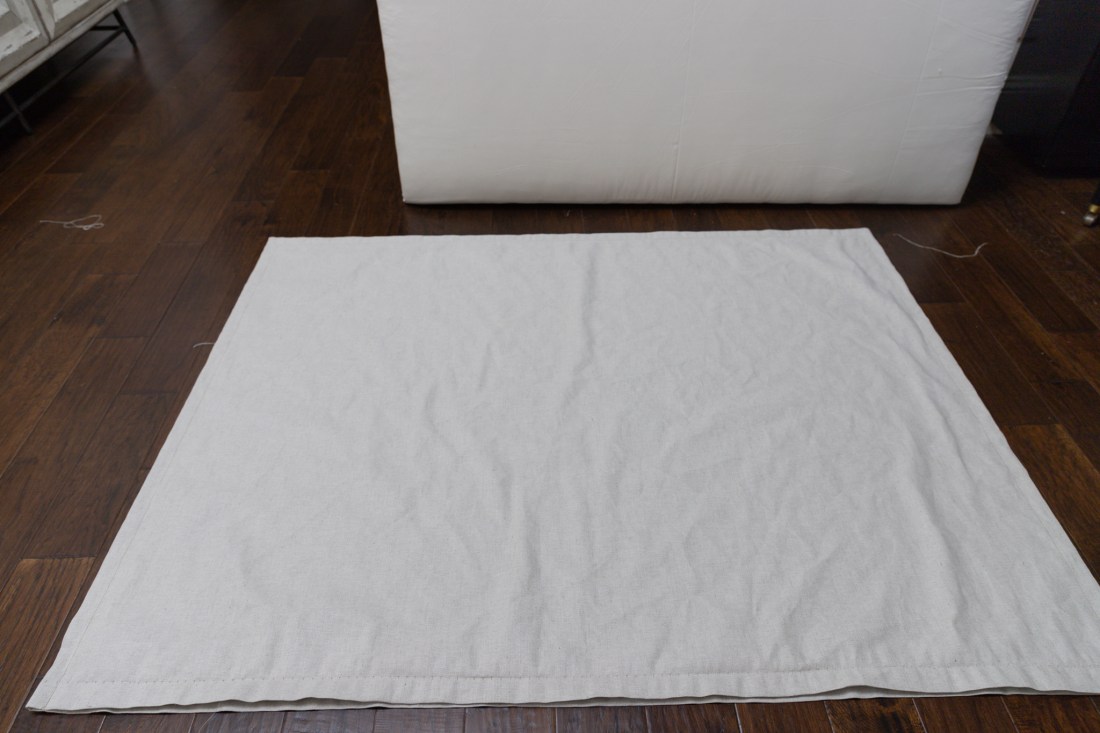
Cut your flannel fabric (the part that will lay on top of the box spring) to be 61″x81″. This will give you a 1/2″ seam allowance all around. Since I went with flannel I had to sew two sections of fabric together to get one 61″x81″ piece. There are lots of wrinkles and folds in the fabric, but you can see my seam down the middle.
On one 61″ side, fold over and hem 1/2″. This side of the fabric will be the part of the bedskirt that meets up with the headboard and all other sides will be sewn to the skirt.

Step 8
Like I mentioned at the beginning of Step 7, I used this tutorial for the bedskirt. Determine how long you want the drop of your skirt to be. I wanted my drop to be 14.5″ so it would float instead of lay on top of the carpet. I cut two 17.5″x84″ pieces for the sides, one 17.5″x64″ piece for the front, and two 17.5″x18″ pieces for the hidden pleats.
Here’s where I did made a slight change to her tutorial. Instead of doing the side hems first and then the bottom hem, I hemmed the bottom first and then the sides. One way isn’t better than another, it’s just my preference so I don’t see the folded bottom hem at the front corners when the skirt is on the bed.
For the bottom hems I folded over 1/2″ and then another 2″ and pressed flat with an iron before stitching in place with a blind hem.
For the side hems I folded over 1/2″ and then another 1.5″, pressed flat with an iron, and blind stitched in place.
The two shorter sections are for the fake pleats at the foot of the bed. Those will be hemmed along the bottom in the same manner (fold over 1.2″ and then another 2″, and then pressed flat with an iron and blind stitched in place), but you can just zig zag the sides since those will not be exposed.

Here’s what the inside looks like on the two side pieces and front piece of the skirt.

And here’s what the outside looks like. This is before my final pressing with the iron so it’s still very wrinkled.

Step 9
Now we’re going to attach all of the skirt piece to each other. Straight stitch the two 17.5″x18″ small hidden pleat pieces to the part of the skirt pieces that come together at the corners of the foot of the bed. Having all of those pieces sewn together will make it so much easier when attaching the large flannel piece of fabric. You will end up with one very long piece of skirt (the long side skirt, shorter front skirt, and the second long side skirt).
Here’s how that hidden pleat will look.

Step 10
Pin your large flannel piece to the skirt pieces and stitch in place with a 1/2″ seam allowance. I found it was easiest to pin and sew the foot of the bedskirt together first, and then pin up and sew up from the foot to the head of the bedskirt one side at a time.

You’re Done!
Congratulations! You just made your very own DIY slipcovered French seam bed! All that is left to do is press your bedskirt and place it over the box spring. As I mentioned earlier, my headboard is not attached to the metal boxspring/mattress frame. The bed is simply pushed up to the headboard keeping it in place.


Sources
- headboard and skirt fabric
- batting
- muslin fabric
- flannel fabric (Wind Chime color)
- wallpaper
- rug
- sheet
- desk – thrifted
- clear chair
Words cannot express how excited I am about how this bed came together. It looks just as beautiful as the inspiration bed, but SOOOO much cheaper. We’re getting closer and closer to having this room update done! To see where were started with Izzy’s room you can check out this post. What do you think? Would you give this DIY a go?


Wonderful Finds


You Might Also Like
- DIY · kitchen · organization
Kitchen Updates with Legrand Radiant Outlets
This post is sponsored by Legrand. Love it or hate it, mobile devices are a huge part of our lives. We have a slew of them at our house. Two cell phones and four iPads come with a lot of cords and charging needs. I felt like our kitchen counter was just one big charging…
Halloween Costumes 2017
Well, that was a Halloween to remember this year! The dark clouds rolled in and not a bit of sun was to be found. Rain, rain, and more rain!! Not that it stopped these two from heading out Trick-or-Treating with their friends. I tried capturing what I could with my phone while getting drenched 😀…
Minecraft Birthday Party
Sam’s birthday was right before Thanksgiving so it’s always hard for me to get a birthday party post up smack dab in the middle of the holidays. Now that I’m back in the swing of things I thought it was time to share with you his Minecraft birthday party. Like all boys I know his…
even if you don’t drink coffee…
…you’ll love this! {via Pinterest via Made By Girl} I’ve had that image pinned for a couple of weeks, and yesterday I finally remembered to pick up whole beans while at the store. Now this graces my vanity in the bathroom! Now all of my makeup brushes, my eyelash curler, and tweezers have…
last minute valentine’s ideas
I’m a very last minute person. Drives my husband insane. Coming up with gifts for Valentine’s Day isn’t going to happen until the last hour. I came across some easy ideas you can bust out that will have you looking like you’ve had it under control all along. FOR YOU AND YOUR FRIENDS: | conversation…
Outdoor Living Makeover with Bassett Furniture
We are less than a month away from Spring, can you believe it? I’m really looking forward to spending more time outdoors and getting some flowers planted. And this Spring and Summer is going to be even better than ever thank to our outdoor living makeover with ! You guys, I have been so excited…


Comments
NewestThis nicely tailored. I love the clean lines with this style. Love her new style and room changes. Sad to lose the little girl style, but she’s growing up fast into a tween.
I can’t believe how much she has grown!
Thank you for sharing the details of your lovely upholstered headboard and bedskirt. A less expensive option would be to make them out of drop cloths. I have used them for making draperies, upholstering dining chairs, and upholstering a headboard. They have a similar look to your more expensive fabric.
Yes, I love using drop cloth! I have several drop cloth projects on the blog where I have used it to slipcover beds, tables, nightstands, etc.
it’s utterly incredible, shelley! what a beautiful bed and lucky girl!
I love her bed more than my own!